PDUSpy? PDUSpy.

After lots of people have asked for it (and I do not really want to hear any more requests for it), I made this little manual for PDUspy.
Please keep in mind that PDUspy is a highly technically oriented tool, that will help you understand what is inside a short message, and that will enable you to create short messages that will do some very strange things.
You may as well use PDUspy as a every-day-tool to send out messages, but you should have a basic understanding of the parameters which could be achieved by reading (and understanding!) chapter 9 of 3GPP TS 23.040 (Technical realization of the Short Message Service). Download it at http://www.3gpp.org .
 
Here we go:
 
PDUspy, page 1   
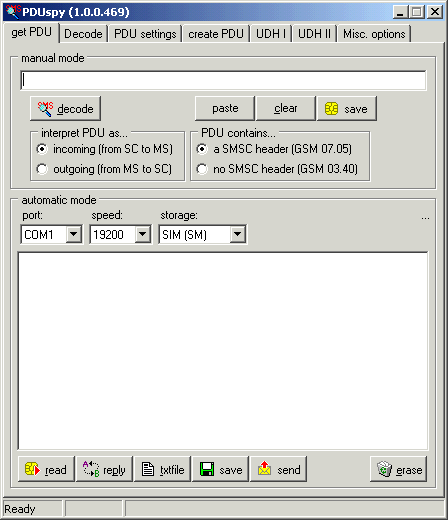
On the first tabsheet, you may enter a PDU to analyze by your own, or you may import a PDU from the clipboard. If you click on 'decode' the PDU will be decoded, and the result will be displayed on the 'Decode' tab sheet. You must tell PDUspy if the message is inbound or outbound, and wether you have a GSM07.05-compatible PDU or a ETS-compatible PDU.
If your mobile phone is able to communicate with PDUspy (it needs to support AT+CMEE, AT+CMGF=0, AT+CPMS and AT+CMGL), you may as well read all messages from the phone, using the settings you made at the 'automatic mode' box. Be sure only to configure a SM memory which is supported by your phone, otherwise you may get a error message. Selecting 'Archive (AR)' will use the message archive on your local disk and will not access the phone.
Press 'read' to try reading the messages from the phone or from the archive, press 'reply' to reply to a marked message, press the 'textfile' button to export all displayed messages to a textfile, 'send' sends out a stored PDU, and 'erase' deletes all marked messages from the selected storage. If you click a message in the overview, it will be decoded, and the decode will be written to the 'decode' tab.
A doubleclick in the textfield on the 'Decode' tab sheet will open the decode in a separate window, closing this window will show the tabsheet again.
     
PDUspy, page 2   
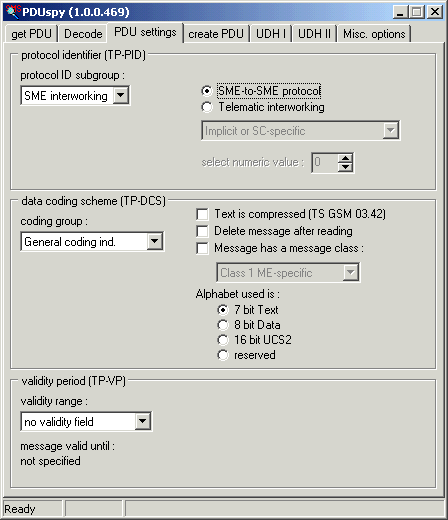
On the third tabsheet (the second holds the decode, if any), you may:
  • set the data coding scheme of the message by assigning a value to TP-DCS. The most useful features of TP-DCS are creating a Class0-message, which will be displayed at once at the receiving phone (often called a flash-message) and setting the charset to 16bit, which will let you send Unicode messages
  • set the validity period of the message by assigning a value to TP-VP if you create a SUBMIT PDU
  • set the command type if you are creating a COMMAND PDU
  • set the protocol ID of the message by assigning a value to TP-PID
Some hints:
Not all TP-VP options are supported by the SMSC, and not the full range of 63 weeks may be available
TP-PID 'network use'/'Replace short message' enables you to do very interesting things
     
PDUspy page 3
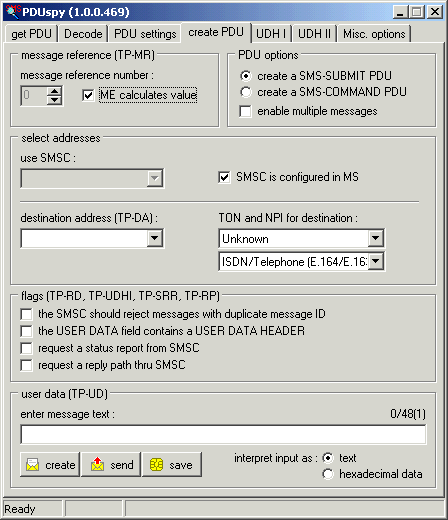
  On the fourth tabsheet, the message itself is created. You may
  • set the message reference number (only change this if you really need it)
  • select between creation of a SUBMIT or a COMMAND PDU
  • enable the 'multiple message' feature
  • select a SMSC to send the message thru (or you may rely on the configured SMSC in the phone)
  • select the recipient (a history of the last recent recipients is in the drop-down field)
  • set the message header flags
You may then enter the message text in the text field, in the upper right you see the current length of the message in characters, the maximum possible length and the number of messages that will be created if the 'multiple messages'-feature is enabled. You may enter UNICODE characters, if you have set the message encoding to 16bit.
By clicking the corresponding button, you may create the PDU and send it to the 'Decode' tab, create and send the message or create and save the message in the message storage selected on tabsheet 1.
Please note that in case of sending a multipart-message, a status report will only be requested for the last created message.
By doing a right-click over the text input field, you may get a menu with some more or less helpful options:
  • 'copy/cut/paste' will obviously do the appropriate action
  • 'EMS options' looks nice, but is not implemented yet (but I had much fun with designing the menus)
  • 'insert SIEMENS picture' will insert one of the displayed pictures, which only works towards Siemens phones
  • 'insert SMSC notify' inserts a command tag in the message which instructs the SMSC to send you a more detailed status report. If you have more command tags for other networks, send them to me
  • 'Create Nokia IAC' creates a Nokia SmartMessage® which configures some of the features within some Nokia phones. Please be careful when sending OTA configurations
  • 'Set UCS2 display font' lets you select the font for the edit field as well as for the decode tab. This is helpful if you want to enter Unicode characters which are included in a special font. I suggest using 'Arial Unicode MS' which has almost every defined Unicode character in it.
You may use the following special character combinations in the text field:
  • '\0' creates a NULL character
  • '\E' creates a ESC character
  • '\C' creates a CARRIAGE RETURN
  • '\L' creates a LINE FEED
  • '\\' creates a BACKSLASH
  • '\a..z' creates a CHR(1..26) depending on the letter (this only makes sense when sending a 8bit message)
     
PDUspy page UDH I   
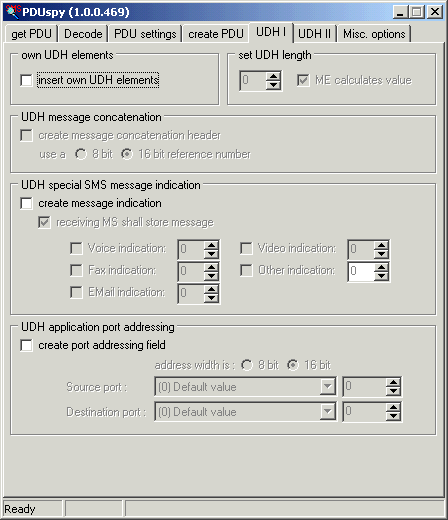
On this tabsheet you may enable some UDH options:
  • you may enable entering your own UDH elements (on the 'create PDU' tab)
  • you may set UDHL to a wrong value, which makes some phones behave weird
  • you may set and reset the message indications in the receiving phone, and you may instruct the phone to immediately delete the message (without displaying the message, but with setting the indicators). It is NOT NICE to do this with other peoples phones
  • you may create a port addressing field, and enter some hexadecimal data for TP-UD (on the 'create PDU' tab)
  • you may enable message concatenation, which sends your text in a big, virtual message using multiple messages to the target phone
PDUspy page UDH II   
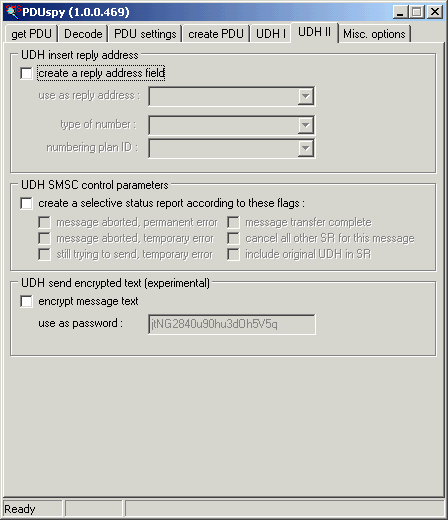
On this tabsheet you may enable some more UDH options:
  • you may create a 'reply address' field, which instructs the receiving phone to send a answer to a message not to the sender of the original message but to a completely other address
  • you may test if your SMSC supports SMSC control parameters (most do not)
  • you may enable message encryption. This is a experimental feature, which is not officially specified. I do this using user data header information element identifier 0x84. The text is encrypted using AES in CFB mode, the password is displayed in the text field. Currently, only PDUspy is able to cope with a encrypted message.
     
PDUspy page 6   
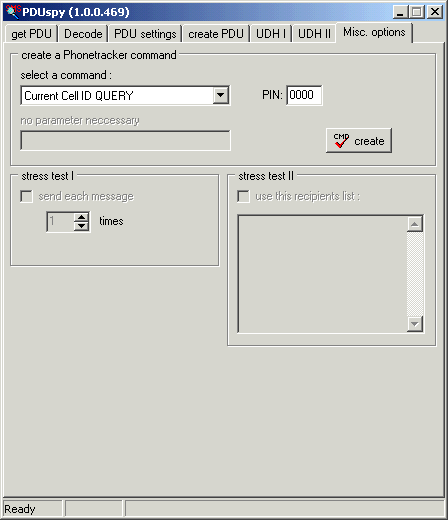
On the last page, you may create a phonetracker command (this implies you already have a phone tracker. Buy it at http://www.phonetracker.de ), or you may enable one of the two 'stress tests', where the first will send each created message a number of times, and the second will send each created message to a number of recipients. Keep an eye on the costs you generate with this, and do not flood other people phones with messages.
    Hey, you did read this to the end. So, here is the bonus: start PDUspy with a command line argument to get access to all advanced functions and options:

pduspy -enablefulllength

It may be a good idea to create a shortcut to PDUspy with this parameter. Have fun.